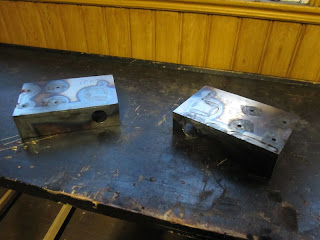
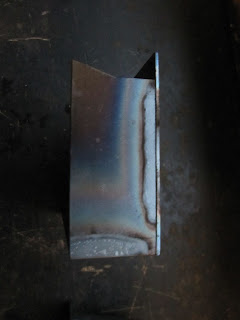
I make a quick post about this stage, as I will have to rebuild these boxes completely in one year. It is actually the only element of the chassis that has to be fully welded at this stage (for now, elements are tacked together and will be fully welded only when the chassis is completely assembled). The problem is that I can't find the right setting for my MIG welder. Welds I've done on these boxes are just horrible, and in one year, I will chose to rebuild them completely. Here are the picture of the construction of these first boxes.
Il s’avérera en plus que l'équerre de fixation supérieure de l'amortisseur arrière était trop en arrière de 5mm, et pas dans l'axe de l'amortisseur au moment où j'ai fait les essais en octobre 2012. Si c'était à refaire, j'attendrai d'avoir les amortisseurs, les triangles et les porte-moyeu arrière pour faire les essais avant de souder le tout.
It will also occur that the upper shock absorber brackets are 5mm too far back, and not in the right axis of the shock absorber when I fit them in October 2012. If I had to do that again, I will wait to have the shock absorbers, the rear wishbones and rear uprights to make trials before fully welding the whole assembly.
I had already cut the 3mm thick plates that will make these boxes while I was waiting for my parts from the laser cut company (espacially the brackets, needed for the construction), see this post. Drilling CP3/CP4. On these plates, 4 M8 nuts will be welded which will be the roll-bar fitting points (see the same post).
Sur CP3/CP4 seront aussi soudées les équerres de fixation supérieur d'amortisseur arrière. Traçage de leur emplacement sur les plaques.
On CP3/CP4 will also be welded the upper shock absorber brackets. Drawing their position on the plates
J'utilise des vis M8 pour maintenir les écrous en place lors du pointage.
I use M8 bolts to hold the nuts in place for tacking.
Et voilà ce dont je parlais au début de ce post : les horribles cordons de soudure qui feront que je prendrai la décision dans un an de refaire complètement ces boites. Beaucoup de chaleur mais peu de pénétration. Comme expliqué dans ce post, en fait, le poste à souder est réglé pour une utilisation sans gaz (avec fil enrobé), et je ne m'en apercevrai qu'à mon retour d'Asie, en avril 2012, ou j'inverserai les fils et aurai le bonheur de voir que ce poste à souder fonctionne en fait parfaitement. Mais à l'heure de la construction de ces boites, mon poste à souder est toujours mal réglé, et les soudures vraiment horribles.
And here is what I'm talking about at the beginning of this post : the horrible weld beads which will make me take the decision to rebuild completely these boxes in one year. A lot of heat, but very few penetration. As explained in this post, in fact the welder was set-up for use without external shield gas, wit flux-core wire, and I will see that only when I come back from Asia, in April 2012. Then I'll reverse the cables, and I will have the joy to see that this welder actually works perfectly. But at that stage of my build, the welder is still wrongly set-up, and welds are just awful.
Une fois l'équerre soudée intégralement, je positionnement et pointe CP6 que j'ai percé à la scie cloche de 33mm. (voir specification de cette pièce dans ce post)
After I fully welded the shock absorber bracket, I tack CP6 in place, that I previously drilled with a 33mm hole saw (see specifications of this part in this post).
Une fois les plaques CP6 intégralement soudé à CP3/CP6, je positionne et pointe le tube de renfort RS15.
Once CP6 fully welded to CP3/CP4, I place and tack bracing tubes RS15.
C'est maintenant ua tour des parois latérales extérieures CP5 d'être soudées.
It is now CP5's turn to be welded. They are the outside walls of the boxes.
Je fais alors les cordons extérieurs...
I weld the external beads...
... que je meule. Une fois de plus, je ne suis pas du tout content des soudures.
... that I grind flush. One more time, I'm not happy with my welds.
Positionnement des boites sur le châssis. J'utilise un niveau à bulle pour l'horizontalité, et une tige filetée M12 pour le parallélisme et la distance des équerres par rapport au tube SB2 sur le châssis.
Positioning the boxes in place on the chassis. I use a spirit level for checking the horizontal plan, and an M12 threaded rod for bracket's parallelism and correct distance with rail SB2 on the chassis.
Et les boites sont en place, je peux maintenant finir la partie arrière.
Boxes are in place I can now finish the rear framework.


Very nice blog... This blog share important information on la construction. Thanks for sharing
RépondreSupprimer