
De plus, j'ai le moteur 2.0i SOHC et sa boite Type 9 que je veux monter dans le Roadster, et le moteur monté dans la Sierra (2.0i DOHC-Twincam) présente un gros trous au niveau du carter d'huile, la voiture ayant apparemment pris un choc par le dessous. Je ne pense pas que le reste du moteur soit touché, et j'espère pouvoir vendre ce moteur, même bon marché. Il faut juste changer le carter, ou bien effectuer la transformation pour réduire sa hauteur, comme expliqué dans le livre, le trou étant dans la partie basse du carter qui doit être retirée pour pouvoir monter le moteur dans le Haynes Roadster.
Voici quelques photos du carter en question (et en bas de cette page, photos du carter vu de l'intérieur)
So, it is time to remove the engine from the Sierra. First, I will not have any use of it, nor of the MT75 gearbox, my chassis having been built to receive a Type9 gearbox. (Indeed, the transmission tunnel design is different for a MT75 gearbox, which is wider. Here is the link to the document with all the explanations for adapting the transmission tunnel to an MT75 gearbox (the book's design is for a Type9). This link is also available in the "Book Amendments & Extra Guides"of the Haynes Forum.)
Furthermore, I've got the 2.0i SOHC engine + its Type9 gearbox i want to fit in the Roadster, and the engine fitted in the Sierra (2.0i DOHC-Twincam) has a hole in the oil sump, the car obviously hit something from underneath. I don't think the rest of the engine is damaged, and I hope i will be able to sell it, even cheap. The new owner will just have to change the oil sump, or to make the sump modification explained in the book to reduce it height, the hole being on the lower part of the sump, which has to be removed for the engine to be used in a Haynes Roadster.
Here are a few pictures of the oil sump (and at the end of this page, pictures of the sump from the inside)


Allez, c'est parti.
Déconnexion de la batterie.
Here we go.
Disconnecting the battery.

Puis du filtre à air. L'ancien proprio avait monté un kit d'admission directe que j'espère pouvoir récupérer sur le Roadster.
And the air filter. The former owner fitted a direct induction kit that I hope I can re-use on the Roadster.

C'est au tour de toutes les durites d'eau (juste 3 photos, mais il y en a bien sur bien plus).
Then all the water hoses (only 3 pictures, but there are much more of course).


As I will remove the complete electric loom (I don't actually know if I will be able to use it with the SOHC, I'll see that later), I mark every single electric connexion I disconnect from the engine, to be able to remember what it is when it is time to reconnect them on the Roadster. Masking tape and permanent marker are advised. I took a lot of pictures to help me reminding later, here are just a few of them. I also disconnected the fuel hoses.


Il faut maintenant retirer la pompe de direction assistée. Pour le coup, c'est un organe totalement inutile au Roadster.
It is also needed to remove the power steering pump, it is a useless element to the Roadster.


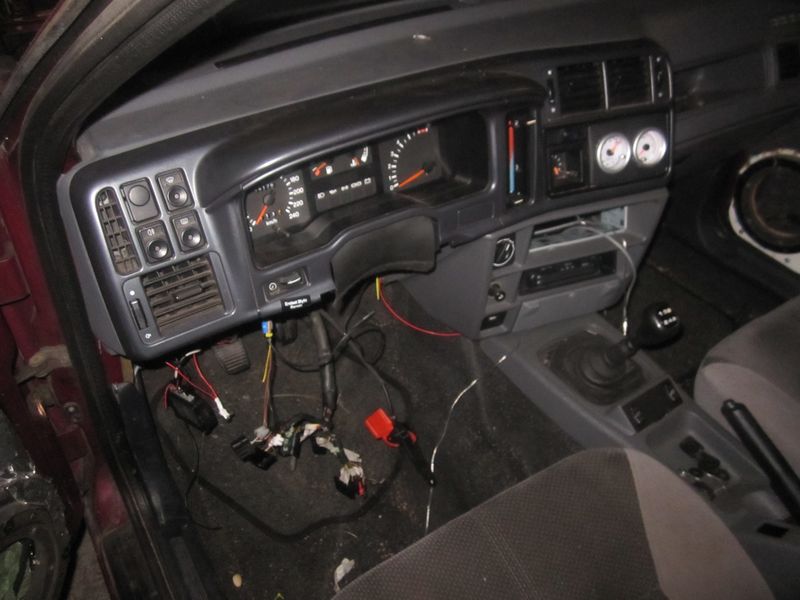
Puis, pour faire de la place autour du moteur, je décide de retirer dès maintenant la colonne de direction.
D'abord le volant.
Then, in order to make room around the engine, I decide to remove the steering column now.
First the steering wheel.


Là aussi il est important de marquer tous les connecteurs.
Here too it is very important to mark all the connectors.


La place conducteur sans volant ni colonne.
The driver side without steering wheel and column.
Et après avoir retirer la partie inférieure de la colonne dans le compartiment moteur, voici tous les éléments de la colonne de direction. Celle-ci est ajustable en hauteur. Je ne sais pas encore si je vais garder celle que j'avais achetée en mai ou si je vais monter celle-ci dans le Raodster. Mais l'une d'entre elle va être à vendre :-)
And after having removed the lower part of the column in the engine bay, here are all the elements of the steering column. This one is height-adjustable. I don't know if I will keep the one I bought in may, or if I will fit this one in the Roadster. Anyway, on of them will be for sale :-)

Il faut aussi décrocher l'échappement du collecteur. Encore des écrous rouillés avec lesquels il a fallu batailler !
I also removed the exhaust pipes from the exhaust manifold. One more time I had to fight with rusty nuts!

Puis le maitre cylindre de frein. La Ford Sierra était bien pensée : une plaque métallique protège le maitre cylindre de la chaleur du collecteur.
And the brake master-cylinder. The Ford Sierra was well designed: an iron plate protects the master cylinder from the exhaust manifold's heat.


I also want to keep the rear brake limiter. Actually, with a drum brake set up, it is not needed to fit a rear brake limiter on the Roadster, you never block the rear wheels before the front wheels. However, those who chose to fit rear disc brakes have to fit this limiter (be careful in that case to respect the original position angle of the limiter, about 20° from horizontal, or the limiter will not work correctly or not at all). I will fit rear drum brakes on my Roadster, so I will have no use of this rear brake limiter, but I want to keep it anyway, you never know! Except that the fitting screws were so rusty that I couldn't remove it at that stage...


... et il m'a fallu attendre que le moteur soit sorti pour pouvoir avoir la place de travailler ces vis pour en venir à bout.
... and I had to wait for the engine to be out to have enough room to work on these screws to get rid of them.

Je retire alors la bobine d'allumage, protégée elle aussi de la chaleur du collecteur d'échappement par une plaque métallique.
Now I remove the ignition coil, also protected from the exhaust manifold's heat by an iron plate.


Je retire aussi les ventilateurs électriques du radiateur d'eau, et le tube inférieur de collecteur d'échappement équipé de la sonde Lamba.
I also remove the electric fans assembly from the water radiator, as well as the lower tube from the exhaust collector fitted with the Lambda sensor.

Comme le moteur ne veut pas sortir facilement (il s'avérera plus tard que j'avais oublié de retirer deux vis de fixation de la cloche d'embrayage sur le moteur), je décide de désolidariser la boite de vitesse de la caisse pour essayer de sortir le tout d'un coup.
As the engine doesn't look to be willing to get out easily (it will appear later that I actually forgot to remove 2 of the screws keeping the clutch bell housing attached to the engine), I decide to detach the gearbox from the car, in order to try to get the engine + gear box out in the same time.
D'abord la traverse de fixation...
First the gearbox mounting cross-bar...

... et le silentbloc de boite ainsi que les vis de fixation de support de commande de boite (en haut de la photo, derrière le gros joint)
... and the gearbox rubber mount, as well as the gear control support screws (top of the picture, behind the big UJ)

On dirait que ça commence à vouloir venir.
It looks like it starts to be willing to get out.


Mais le carter (cassé) était dévissé du bloc, et coince contre la direction. Pour m'en débarrasser, il me faut lever le moteur plus que ça, mais vers le haut, c'est la boite qui coince contre la caisse.
But the (broken) oil sump was unscrewed from the engine block, and it is stuck behind the steering rack, not allowing me to pull the engine forward. To get rid of it, I have to lift the engine more than this, but upward, this is the gearbox touching the body which doesn't allow me that.


Je dois donc séparer la boite du moteur, je n'ai pas d'autre choix. Maintenant que le moteur est un peu dégagé, et que j'ai une meilleur vue sur sa face arrière, je m'aperçois donc que deux vis de fixation maintiennent toujours boite et moteur ensemble. Tout s'explique !
I have to separate the engine from the gearbox, I have no other choice. Now that the engine is out a little, I have a better view on its rear face, and I can see that there are two screws still holding engine and gearbox together.

Dès que j'ai retiré ces deux vis, il m'a juste fallu tirer un tout petit peu sur le moteur pour qu'il commence à se séparer de la boite. Enfin !
As soon as I removed these two screws, I just had to pull a little on the engine for it to starts separating from the gearbox. Finally!


Avant d'aller plus loin, je demande de l'aide car je ne veux pas manipuler la chèvre, le moteur et la boite tout seul, d'autant qu'il me faut manœuvrer serré car je n'ai pas beaucoup de place pour caser cet autre moteur et cette autre boite. Sandra vient donc gentiment me donner un coup de main, et on arrive à sortir le moteur...
Before going further, I ask some help, as I don't want to manipulate the crane, the engine and the gearbox alone, and because I will have to steer the crane accurately as I don't have a lot of room to put this other engine and this other gearbox. Sandra nicely comes to give me a hand, and we can manage to take the engine out...


... ainsi que la boite.
... as well as the gearbox.

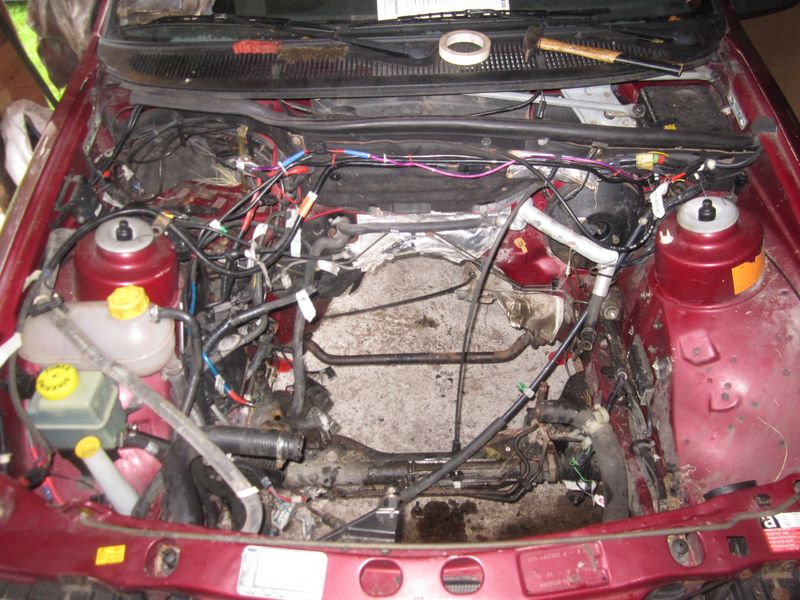
Le compartiment moteur... sans moteur.
The engine bay... without engine.
Le moteur est posé sur des poutrelles de bois pour ne pas abimer le dessous (il n'y a pas de carter). Il repose sur le volant moteur d'un coté, et sur le support de pompe de DA et la poulie de pompe à eau de l'autre. A côté, la boite de vitesse, et la partie avant de l'arbre de transmission que je n'ai finalement pas eu à retirer !
The engine stands on small timbers in order to preserve the under part (there is no sump). It rests on the flywheel on one side, and on the power steering pump bracket and the water pump pulley on the other side. Beside stands the gearbox, and the front part of the propshaft that I finally didn't have to remove !

Les deux moteurs et les deux boites.
The two engines and the two gearboxes.

Le moteur DOHC.
The DOHC engine

Et le carter d'huile...
And the oil sump....

... et son gros trou sur la gauche.
... and its big hole on the left side.

Aucun commentaire:
Enregistrer un commentaire